
Sometimes it’s convenient to have magnets you can turn on and off. For example, the magnets recyclers use to pull steel cans out of general rubbish and then drop them into containers. Similar magnets are used for moving large, heavy steel objects – like dropping cars into crushers at an auto-wreckers.
These types of non-permanent magnets are known as electromagnets; not surprisingly because they use electricity. Turn on the power – you have a magnet. Turn it off – you don’t.
Making an electromagnet is quite easy and you can have a lot of fun trying to improve it.
Step 1 – Materials

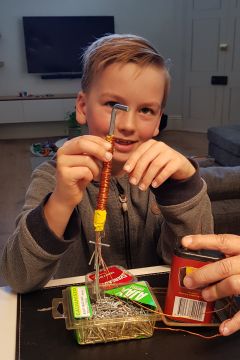
A steel rod – I’m using a tent peg because Scouts should always have lots of them. If you also want to use a tent peg make sure it’s not a soft aluminium peg which are frequently included with hike tents. They won’t work. Otherwise you’ll find a good source of steel rods in the household toolbox. Screwdrivers are the obvious choice, but a large bolt or nail will also work.
Batteries – We’ll use common 1.5v AA batteries and join them up to make more power.
Insulated wire – You’ll need a lot of this and it needs to be thin. Communication wire is ideal. I’m using wire from an old network cable. It’s about 5m long. A network cable contains 8 separate stands of wire (you only need 1) – unravelling it will keep you occupied for quite some time! Alternatively the phone wire on your landline is very similar. Would anybody notice if you took it? Probably not. Forget 3 core household electrical cable. It’s much too too thick. Your electromagnet will become very fat very quickly.
Adhesive tape – To join batteries together, connecting wires to terminals and for general usefulness.
Step 2 – Assembly

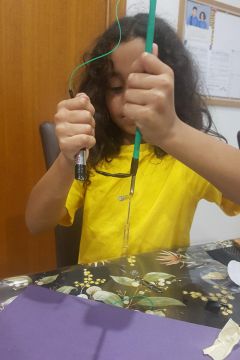
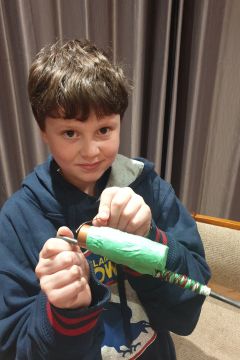
Starting about 20cm along the wire begin winding it around and down the peg. Keep the windings tight and close together. When you get a few cm from the end of the peg wind it back up. Continue doing this until you have run out of wire. Keep the final 20cm off the peg so you can connect it to the battery. To stop the wire unravelling you can tape it to the rod.
Remove a few cm of insulation from each end of the wire. You might be able to do this with your finger nails as the insulation is very thin. Otherwise delve into the toolbox and see what you can use.

Next we’ll join a couple of 1.5v batteries together with tape. That will give us a total of 3v. Make sure the positive and negative terminals are touching when you put the tape on.
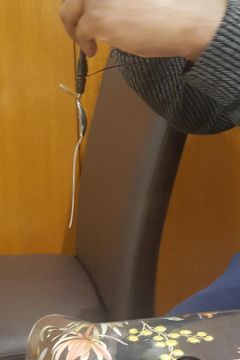
Now tape one end of the wire to the negative battery terminal (the flat side). Don’t tape the other end to the positive terminal otherwise you won’t be able to turn off your electromagnet. You can simply hold it in place with your thumb.
I found it quite convenient to also tape the batteries to the electromagnet itself.

Step 3 – Action!
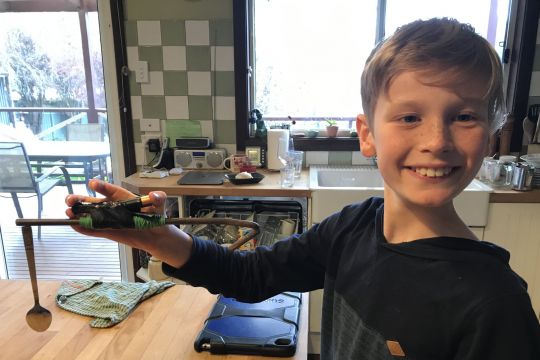
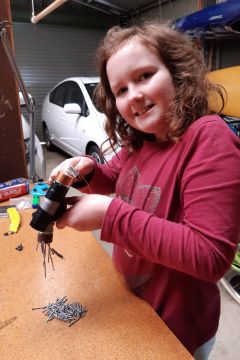
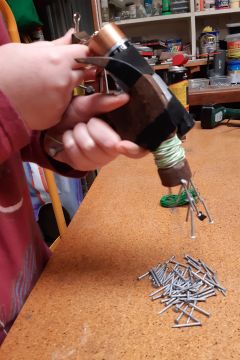
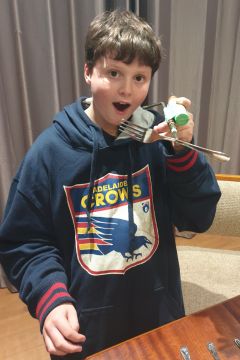
You’re ready to go! See what you can pick up. A bunch of small nails or tacks can be fun. The magnetism spreads through them and you will pick up much more than you expect. Rifle through your cutlery draw. You’ll be surprised at how strong the magnet is. It will easily pick up spoons and forks.

There’s something satisfying about disconnecting the power and watching all the objects clatter to the ground.
Test the strength of your electromagnet by weighing the heaviest object it can lift. Or load it up with lots of small things and weigh those.
Making it Better or Worse?
The Voltage – How does the voltage affect the power of the magnet? Try a single 1.5v battery or add extra batteries and pump up the voltage to 4.5v or 6v.
The Windings – If you have spare wire extend what you’ve wrapped around the peg and create more windings. Does it make any difference to the power?
The Core – Does the diameter of the steel rod make a difference? Try making an electromagnet from something really unusual? How about a pair of scissors or a spanner or a steel ruler?
Getting Creative – If you are feeling especially creative you could make a Lego or cardboard crane and attach your electromagnet to it. Or how about making a simple switch to turn the magnet on and off.

My Observations
Not wishing you to suffer unnecessarily, here are some tips to put you on the fast-track to success:
For maximum attraction the steel rod needs a large flat surface. The tip of a tent peg or nail is not ideal. A bolt head might be better – but I haven’t tried it.
Plastic tape is not very good for joining up your batteries. It stretches just enough to break the connection. I ended up using masking tape which was much better.
Prolonged use of your electromagnet will drain the batteries quickly, so consider 1.5v C & D types if you intend to do some intense work with it.
You may notice that the wire coil becomes quite warm after a little bit of use. It does depend on how thick the windings are and how long the rod is. There was a noticeable difference between the nail and the tent peg. If you apply too much voltage it will possibly get hot enough to start melting or at least fusing the insulation. Be careful.
How did you get on?
Let me know how you got on in the comments. What tricks did you discover? How strong was your magnet?
Send me some photos and I’ll add them to a gallery below.


2 replies on “Make A Tent Peg Electromagnet”
We look forward to trying this!
Well after almost giving up we finally had success! I think your tip about the plastic tape v masking tape was on the money. We used plastic tape and had to squeeze the batteries together quite a. It to get a connection. We got there though!